Table of Contents
- Tools Needed for Door Closer Installation
- Reading the Template and Understanding Mounting Configurations
- Regular Arm Installation: Pull Side
- Top Jamb Installation: Push Side
- Parallel Arm Installation: Push Side with Soffit Plate
- Commercial Door Closer Adjustment Guide
- ADA Door Closer Force Requirements and Fire-Rated Doors
- Frequently Asked Questions
Last Updated: September 29, 2026
Tools Needed for Door Closer Installation
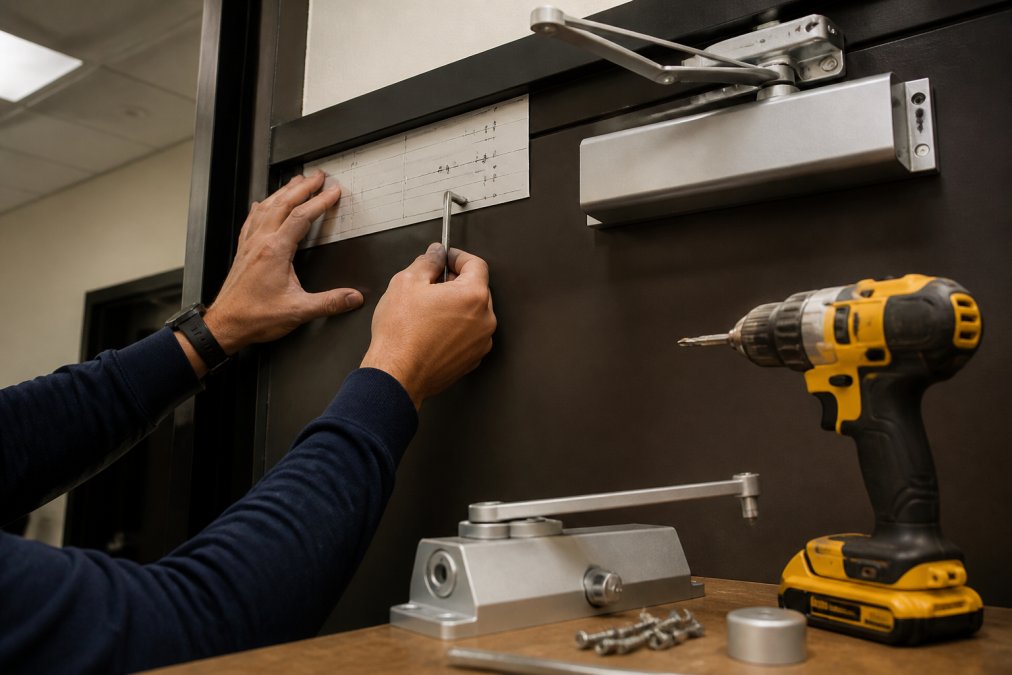
A commercial door closer installation guide is only as good as the prep behind it, which begins with a hex key set, a cordless drill, and the template that ships with your closer.
Here's what you need:
- Hex key set (Allen wrenches): For adjustment valves and arm assembly screws.
- Cordless drill with bits: Pilot holes for machine screws and through-bolts.
- Door closer template: The paper or cardboard guide packed with your unit.
- Tape measure and pencil: For marking pivot points and frame locations.
- Fasteners: Machine screws, through-bolts, and sex nuts sized to your door.
- Adjustable wrench and screwdriver: For the arm assembly and soffit plate.
- Safety glasses: Spring power under tension is unforgiving.
Reading the Template and Understanding Mounting Configurations
The template is the most important document in the box, and most first-time installers skim it. A door closer template is a full-scale drilling guide that maps every hole, pivot point, and bracket location for your closer model and door width. It is the manufacturer's certified hole pattern, and deviating from it is the fastest way to void a listing on a rated assembly.
How to Read a Door Closer Template
Templates fold out to full scale. Follow this sequence:
- Identify the correct panel. Most templates include separate diagrams for regular arm, top jamb, and parallel arm. Confirm you're viewing the one matching your configuration before marking anything.
- Find the door width row. The chart lists widths in inches (typically 24-48 in.). Your door width determines which column of hole locations applies.
- Confirm the handing. Left- and right-hand doors use mirrored hole patterns. If your template shows both, verify which side you're standing on before transferring marks.
- Align the reference edge. Templates reference off the hinge or latch edge depending on configuration. Tape the template flat and confirm the reference line sits flush before marking.
- Center-punch every mark. A pencil dot rolls under a drill bit. A center punch creates a divot that keeps the bit from walking on hollow metal.
The Three Mounting Configurations
Three mounting configurations cover nearly every commercial door. The table below is a starting point, but the geometry differences matter more than the labels:
| Configuration | Side | Hardware | Best For |
|---|---|---|---|
| Regular arm | Pull side | Bracket on frame | Standard swing doors |
| Top jamb | Push side | Soffit plate | Narrow frames |
| Parallel arm | Push side | Soffit plate + bracket | High-traffic doors |
Door Weight and Spring Size Before You Drill
Read the template's door width chart before you drill. Door weight and width together determine spring power settings, and getting that wrong means the door either slams or won't latch. Most manufacturers publish a sizing chart mapping spring size (often 1 through 6) to a door width range at a given weight. A 36-inch exterior door in a high-wind location needs a larger spring size than the same width interior door, because the closer must overcome stack pressure and wind load, not just door mass.
Regular Arm Installation: Pull Side
Regular arm mounting is the most common configuration and the one most installers learn first. The closer body mounts on the pull side, with the arm connecting to a bracket on the frame.
The sequence matters:
- Position the door closer body using the template's pull-side marks.
- Drill pilot holes and mount the body with machine screws or through-bolts.
- Attach the mounting bracket to the door frame at the marked height.
- Connect the arm assembly to the pinion shaft, then to the bracket.
- Tighten the arm fastener, leaving enough play for the arm to travel.
Top Jamb Installation: Push Side
Top jamb mounting puts the closer on the push side, with the body on the frame's top jamb and the arm reaching down to the door. It suits narrow frames where a pull-side bracket won't fit.
Steps:
- Mark the top jamb using the template's push-side dimensions.
- Mount the door closer body to the jamb with the supplied fasteners.
- Install the arm assembly and connect it to the door-mounted bracket.
- Verify the arm clears the frame through the full swing.
Parallel Arm Installation: Push Side with Soffit Plate
Parallel arm mounting is the workhorse for high-traffic commercial doors. The closer body mounts on the push side, the arm folds back parallel to the door face, and a soffit plate anchors the arm to the frame head.
- Mount the soffit plate to the frame head per the template.
- Attach the door closer body to the push side of the door.
- Connect the arm assembly to the pinion shaft.
- Secure the arm to the soffit plate and check the fold-back clearance.
Commercial Door Closer Adjustment Guide
Adjustment is where a functional door becomes a compliant one. Every hydraulic door closer has three hex-key valves: closing speed, latching speed, and backcheck.
| Adjustment | Valve Location | Symptom If Wrong | Fix |
|---|---|---|---|
| Closing speed | Main sweep valve | Door slams or crawls | Turn hex key clockwise to slow |
| Latching speed | Latch valve | Door won't latch | Increase latch speed slightly |
| Backcheck | Backcheck valve | Hard stop, frame damage | Increase cushioning |
ADA Door Closer Force Requirements and Fire-Rated Doors
This is the section most commercial door closer installation guides skip, and the one that matters most to property managers, facility teams, and anyone signing off on an inspection. A closer that works is not the same as one that complies.
The 5-Pound Interior Threshold
The ADA Standards for Accessible Design cap interior door opening force at 5 pounds, measured at the leading edge with the door at rest, not by how hard the closer feels when you swing it. Exterior doors may use higher force to overcome wind and stack pressure, but interior doors on an accessible route are held to 5 pounds.
How Spring Size and Valves Interact With the 5-Pound Limit
Three variables determine whether a door meets the 5-pound threshold:
- Spring size. The spring is the primary force source. One sized for a heavier or wider door will push opening force above 5 pounds no matter how you set the valves.
- Closing speed valve. Controls the main sweep. It doesn't change opening force directly, but too much spring power feels heavy on opening regardless of sweep setting.
- Latching speed valve. Governs the final few inches before the latch engages. Set too high, it makes the door hard to open from the latch side because the closer fights the user through the last part of the swing.
Fire-Rated Door Considerations
Fire-rated doors add a second layer of requirements that most installation guides ignore entirely. A fire-rated door closer must carry the correct listing for the assembly, and the door must self-close and latch reliably. The NFPA 80 Standard for Fire Doors governs these assemblies, and any closer swap on a rated door needs to match the original listing.
The installation implications are concrete:
- Do not drill through the door core. Fire-rated doors have a labeled core, and drilling through it, for a through-bolt, wire pass, or hole outside the template pattern, can compromise the rating. Use the template's hole pattern and nothing else.
- Match the closer listing to the door listing. A closer listed for a 20-minute door isn't automatically acceptable on a 90-minute door. Check both labels.
- Self-closing and positive latching are not optional. A fire door that doesn't latch is a failed fire door, regardless of how well it swings. The latching speed valve makes positive latching happen.
- Do not defeat the closer. Removing the arm, disconnecting the closer, or propping a fire door open defeats the assembly, a common inspection finding and cause of citation.
What This Means for Facility Teams
For teams managing multifamily or institutional buildings, closer selection and adjustment are compliance decisions, not just maintenance ones. A closer meeting the 5-pound threshold on day one can drift out of compliance as hydraulic fluid warms, the door settles, or the arm wears. Re-check opening force after any seasonal change, because temperature affects fluid viscosity and closing speed.
Frequently Asked Questions
How do I install a commercial door closer?
Start by checking the door width, weight, and frame type, then pick a mounting configuration (regular arm, top jamb, or parallel arm) that matches the template. Mark and drill holes, bolt the closer body to the frame or door, and attach the arm assembly. Adjust closing speed, latching speed, and backcheck valves with a hex key. Test the door through its full swing and verify it meets ADA force limits if required.
How much does it cost to install a commercial door closer?
Pricing depends on the door closer model, mounting configuration, door material, and whether the frame needs reinforcement. Labor rates vary by region and contractor. For current pricing on Cal Royal Hardware door closers or to request a quote, visit the store page. Installation costs are separate from the hardware itself and should be confirmed with your chosen installer.
What are the differences between regular arm, top jamb, and parallel arm mounting?
Regular arm mounting places the closer on the pull side of the door, with the arm extending to the frame. Top jamb mounting puts the closer on the push side, attached to the frame face above the door. Parallel arm mounting also sits on the push side, but the arm runs parallel to the door when closed and uses a soffit plate. Each configuration affects clearance, ADA force requirements, and template hole locations.
How do I adjust the closing speed and latching speed of a door closer?
Locate the adjustment valves on the closer body, usually marked for sweep and latch. Use the correct hex key to turn the sweep valve clockwise to slow the main closing cycle, or counterclockwise to speed it up. The latch valve controls the final few degrees before the door closes. Make quarter-turn adjustments and test after each change. Over-tightening can damage the hydraulic system.
Are there ADA requirements for commercial door closer force?
Yes. The ADA Standards for Accessible Design limit the force needed to open an interior door to 5 pounds maximum. This applies to doors on an accessible route. Door closers must be adjusted so the door opens with no more than 5 pounds of force. Closing speed should allow at least 5 seconds from 90 degrees to 12 degrees. Check local codes for additional requirements.
What tools do I need for door closer installation?
You will need a drill with assorted bits, a hex key set (often included with the closer), a tape measure, a pencil, a center punch, a level, and the correct fasteners (machine screws or through-bolts). A door closer template is essential for accurate hole placement. For fire-rated doors, verify that all fasteners meet the door manufacturer's requirements.
How do I adjust the backcheck on a door closer?
The backcheck valve controls how firmly the door cushions when opened forcefully. Find the backcheck adjustment screw on the closer body, usually marked BC. Turn it clockwise with a hex key to increase cushioning, or counterclockwise to reduce it. Adjust in small increments and test by opening the door at normal speed. Proper backcheck adjustment prevents wall and frame damage.