Last Updated: November 19, 2026
Quick Summary
To install an ADA compliant door threshold, measure the full opening and floor-to-floor rise, then fasten a low-profile saddle threshold with the correct anchors for your substrate. The threshold must be 1/2 inch maximum, and anything above 1/4 inch must be beveled on both sides at a slope of 1:2 or flatter.
- Measure the full opening at the frame base, the floor-to-floor height difference, and the gap width before ordering.
- Thresholds from 1/4 inch to 1/2 inch must be beveled on both sides with a slope of 1:2 or flatter.
- Use sleeve or wedge anchors with a matching masonry bit when installing on a concrete slab.
- On wood subfloors, fasten with 10 x 1-1/2-inch wood screws and countersink so the heads sit flush.
- A rocking threshold usually means debris underneath or a high spot; lift, clean, and shim or grind.
Table of Contents
- Tools and Materials for Installing an ADA Compliant Door Threshold
- ADA Threshold Requirements and Door Threshold Height Building Code
- Selecting the Right Saddle Threshold by Measured Rise and Opening
- How to Install an ADA-Compliant Door Threshold on Concrete
- Installing a Threshold on Wood Subfloors and Steel Frames
- Troubleshooting Common Installation Issues and Verifying Accessibility
- Ordering Your ADA Compliant Door Threshold from Cal Royal Hardware
- Frequently Asked Questions
Tools and Materials for Installing an ADA Compliant Door Threshold
An ADA compliant door threshold is a low-profile transition strip that bridges the gap between two floor surfaces while keeping the doorway passable for wheelchairs, walkers, and strollers. Getting the height and fit right is the whole job. At Cal Royal Hardware, we supply saddle thresholds in several widths.
Gather these before you start:
- Tape measure and a pencil
- Hacksaw or power miter saw with a metal-cutting blade
- Rotary hammer drill and masonry bits for concrete
Measuring and Preparation Essentials
Measure the full opening at the base of the frame, jamb to jamb. Do not rely on the old threshold as a template, since floors can settle over time.
Record three numbers: the finished opening width, the height difference between the two floors, and the width of the gap the threshold must cover. Those three numbers decide which profile you buy.
Pull the old threshold: cut the sealant line with a utility knife, then work a pry bar under the ends.
- Measured full opening width at frame base
- Recorded floor-to-floor height difference
- Removed old threshold and cleaned the sill
ADA Threshold Requirements and Door Threshold Height Building Code
The short answer: door threshold height building code limits a threshold on an accessible route to 1/2 inch maximum, and anything above 1/4 inch must be beveled on both sides with a slope no steeper than 1:2. That comes from the ADA Standards, which the U.S. Access Board's ADA Standards for Accessible Design publishes as the reference text.
Door Threshold Height Building Code Limits
The building code side matches the federal rule. The International Building Code, which most states adopt, sets the same 1/2-inch cap and the same bevel requirement for changes in level on accessible routes.
What this means in practice:
| Change in Level | Requirement |
|---|---|
| Up to 1/4 inch | Allowed, no bevel required |
| 1/4 inch to 1/2 inch | Must be beveled on both sides, slope 1:2 or flatter |
| Over 1/2 inch | Not permitted on an accessible route; use a ramp |
A 1/4-inch saddle threshold sits right at the line where beveling stops being mandatory. For the whole opening, our guide to ADA compliant door hardware requirements covers levers, closers, clear width, and thresholds together.
Selecting the Right Saddle Threshold by Measured Rise and Opening
Match the profile to your three measurements, not to what is on the shelf. The width has to span the sill and the height has to match the rise.
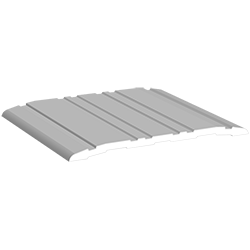
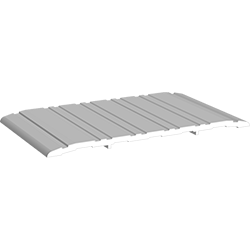
Our quarter-inch saddle thresholds come in these widths:
| Model | Height | Width | Price | Best For |
|---|---|---|---|---|
| CR3704 | 1/4" | 4" | $23.75 | Narrow sills, tight openings |
| CR3715 | 1/4" | 5" | $31.00 | Standard exterior frames |
| CR3726 | 1/4" | 6" | $38.85 | Wider sills and flooring transitions |
| CR3767 | 1/4" | 7" | $55.85 | Deep sills, large gaps |
Price
Each model comes in 36, 48, 72, or 96-inch stock lengths with Mill Aluminum or Duro finish.
A common mistake is buying by height alone. Height and width describe the cross section, not the length, so check the full installed detail before ordering.
The CR3704 saddle threshold is 4 inches wide, the CR3715 saddle threshold is 5 inches wide, the CR3726 saddle threshold is 6 inches wide, and the CR3767 saddle threshold is 7 inches wide.
How to Install an ADA-Compliant Door Threshold on Concrete
Concrete is a common exterior substrate that requires careful preparation. The threshold must sit flat on the slab, and the fasteners must hold in masonry rather than strip out.
Work through these steps in order:
- Dry-fit the threshold across the opening. Mark where it meets each jamb.
- Trim the ends with a hacksaw or miter saw. Notch around jamb stops where needed.
- Set the threshold back in place and mark the mounting holes onto the slab.
- Pull the threshold and drill pilot holes with a masonry bit. Match the bit to your anchor size.
- Run a bead of exterior sealant along the slab edge before resetting the threshold.
- Drive the concrete anchors through the predrilled holes. Snug them, do not over-torque.
- Seal the seam where the threshold meets each jamb.
Preparing the Concrete Slab
A threshold that rocks is a threshold that leaks. Before drilling, check the slab for high spots, spalled edges, and old sealant residue. Run a straightedge across the sill area; any gap under it shows where the slab is not flat.
Sweep and vacuum the sill. Dust left in a pilot hole keeps the anchor from seating, and a loose anchor is the most common cause of a threshold working loose.
Choosing and Setting Concrete Anchors
Concrete anchors hold by expansion, so hole depth and diameter matter more than driving force. Two anchor types dominate this job:
- Sleeve anchors expand along their full length and suit older or softer concrete because they spread the load. They are more forgiving if the hole is slightly oversized.
- Wedge anchors hold better in sound, hard slabs and are the usual choice for newer commercial pours. They concentrate force at the bottom of the hole, so they demand a clean, correctly sized hole.
Drill to the anchor manufacturer's specified depth and always follow the printed instructions. Use a bit that matches the anchor diameter exactly; a 1/4-inch anchor takes a 1/4-inch bit, not the next size up.
Watch out: drilling a hole that is too large for the anchor is the fastest way to a loose threshold. If a hole opens up, move to the next predrilled position rather than forcing a larger anchor.
Sealing and Weatherproofing
Sealant keeps water out and locks the threshold against vibration. Run a continuous bead of exterior-grade sealant along the slab edge and around each end where the threshold meets the jamb.
After the anchors are snug, seal the fastener heads and the seam at each jamb. A gap at the ends is the most common water-entry point on an exterior threshold.
Concrete Versus Other Substrates
Concrete is not the only substrate you will meet. The table below compares the common ones so you can pick the right anchor and bit before you start.
| Substrate | Anchor Type | Bit Type | Preparation |
|---|---|---|---|
| Concrete slab | Sleeve or wedge anchor | Masonry bit | Grind high spots, clean dust from holes |
| Wood subfloor | #10 x 1-1/2-inch wood screws | Wood bit | Pilot hole smaller than screw shank, countersink |
| Tile | Masonry anchor or screw into substrate below | Masonry bit | Drill through tile without cracking, seal penetration |
| Steel frame | Fasten to floor, not frame | , | Check with door supplier before drilling frame |
On a wood subfloor, fasten with wood screws through the predrilled holes, drilling pilot holes smaller than the screw shank and countersinking so the head sits flush.
For any substrate, dry-fit before you drill. The threshold should sit flat with no rock.
Installing a Threshold on Wood Subfloors and Steel Frames
Wood subfloors are the easier job. Fasten with wood screws straight through the predrilled holes; our listings specify #10 x 1-1/2-inch wood screws, so check the supplied kit against your actual substrate.
On wood:
- Drill pilot holes smaller than the screw shank
- Countersink slightly so the screw head sits flush
- Seal the perimeter after fastening
For any substrate, dry-fit before you drill. The threshold should sit flat with no rock. A strip that rocks will work loose, and a loose threshold is a trip hazard and a water leak in one.
Troubleshooting Common Installation Issues and Verifying Accessibility
Most callbacks come down to a handful of problems. This section covers how each one shows up, what to do about it, and how to verify the finished threshold meets accessibility requirements before you call the job done. When a callback points to a fit problem, measuring a doorway for access can help confirm that the opening and threshold work together for a clear, usable passage.
Troubleshooting Common Problems
| Problem | Likely Cause | Fix |
|---|---|---|
| Threshold rocks when stepped on | Uneven sill or debris underneath | Lift, clean, and shim or grind the high spot |
| Door drags on the threshold | Profile too tall for door clearance | Check door-bottom clearance before ordering |
| Water seeps under the ends | Sealant gap at jamb | Re-caulk the full perimeter, ends included |
| Fastener spins in the hole | Oversized pilot hole | Relocate to the next hole position |
| Sharp edge on trimmed end | Burr left from cutting | File or sand the end smooth |
A rocking threshold is the most common failure, usually from debris under the strip or a high spot on the slab.
A door that drags usually means the profile is too tall for the door-bottom clearance. Check clearance before ordering.
Water at the ends points to a sealant gap: re-caulk the full perimeter and tool the bead so it bonds to both surfaces.
Verifying Accessibility After Installation
After installation, verify the job with a few simple checks:
- Roll a wheelchair or cart across the threshold. It should pass without a bump.
- Open and close the door several times. It should self-close and latch without rubbing.
- Look along the threshold edge for gaps. Any gap gets sealant.
Walk the transition yourself at a normal pace. If your toe catches, a wheel will too. For a broader check of the whole opening, our guide to ADA compliant door hardware requirements covers levers, closers, clear width, and thresholds together.
When to Call a Professional
Most threshold replacements are within reach of a careful homeowner. Call a professional if the slab is badly cracked or spalled, the door frame is out of square, or the opening is on a commercial accessible route where code compliance must be documented.
Ordering Your ADA Compliant Door Threshold from Cal Royal Hardware
The right threshold comes down to three measurements and one profile. Measure the opening, match the height and width, then order the next stock length up so you can trim to fit.
Our quarter-inch saddle thresholds come in 4, 5, 6, and 7-inch widths, with Mill Aluminum or Duro finish and 36 to 96-inch lengths.
Get your measurements, pick the model, and search our store to order the threshold that fits your opening.
The hardest part of this job is not the drilling. It is buying the right profile before you start.
Frequently Asked Questions
What are the ADA compliance requirements for thresholds?
The ADA Standards limit threshold height on accessible routes, and the current edition should be checked for your project. Any change in level between 1/4 inch and 1/2 inch must be beveled with a slope no steeper than 1:2. Verify the current edition that applies to your project and confirm the installed detail, since a lower nominal height alone does not establish accessibility.
How do I install a commercial door threshold on concrete?
Measure the opening at the frame base, cut the threshold to the full width, and notch the ends around the jamb stops. Dry-fit the saddle, mark the mounting holes, then drill pilot holes with a masonry bit sized for your concrete anchors. Vacuum the dust, set the anchors, and drive the fasteners snug without over-tightening. Finish with a continuous bead of exterior sealant along both edges, then operate the door to confirm it self-closes and latches without interference.
How is a door threshold attached?
Most saddle thresholds attach through predrilled holes using #10 x 1-1/2-inch wood screws into wood subfloors or concrete anchors into slabs. Always match the fastener to the actual substrate, and check the supplied kit against the manufacturer's installation sheet before drilling.
How do you seal a threshold against water and drafts?
Apply a continuous bead of exterior-grade sealant along both the interior and exterior edges of the threshold where it meets the floor and the door frame. Fill any gaps at the jamb ends where you notched the threshold. Use a sealant rated for exterior use and compatible with aluminum, then smooth the bead and let it cure fully before exposing the door to water.